ALERTS
iPhone users:
If you have upgraded to iOS 16, and your app does not detect the nearby market anymore, restart your phone. Click HERE for instructions on how to restart your phone.
If your app still does not detect the nearby market: Go to Settings —> Privacy & Security —> Location Services, and make sure that “Location Services” is turned ON. If it is ON, then scroll down to the GrabScanGo app, select it, and make sure that “While Using the App” is checked, and “Precise Location” is turned ON.
If you are unable to scan products using the camera, make sure you have allowed camera access for the GrabScanGo app.
INTRO
This Help page is for the latest version of the GrabScanGo app. Keep your app updated, so you benefit from all the latest features and bug fixes.
The app uses iBeacon technology to work, which requires both your Bluetooth & Location Services to be ON.
TO USE THE APP:
- You must have Bluetooth ON
- You must have Location Services ON
- You must SIGN UP for an account
- You must ALLOW camera access to scan product barcodes
INITIAL SETUP
TURN BLUETOOTH ON – if you did not turn it ON during app installation
- iOS:
- Go to Settings -> Bluetooth
- Turn Bluetooth ON
- Android:
- Go to Settings -> Bluetooth
- Turn Bluetooth ON
Note: If your phone is not detecting a nearby market, try turning Bluetooth OFF and then back ON.
TURN LOCATION SERVICES ON – if you did not turn them ON during app installation
- iOS:
- Go to Settings -> Privacy -> Location Services
- If Location Services are OFF, turn them ON
- Scroll down to & click on the “GrabScanGo” app
- Select “While Using the App”
- Android:
- Go to Settings -> Location
- If Location Services are OFF, turn them ON
- Go to Settings -> Privacy and emergency -> App permissions -> Location
- Scroll down to & turn Location Permissions ON for the “GrabScanGo” app
Note: If your phone is not detecting a nearby market, try turning Location Services OFF and then back ON.
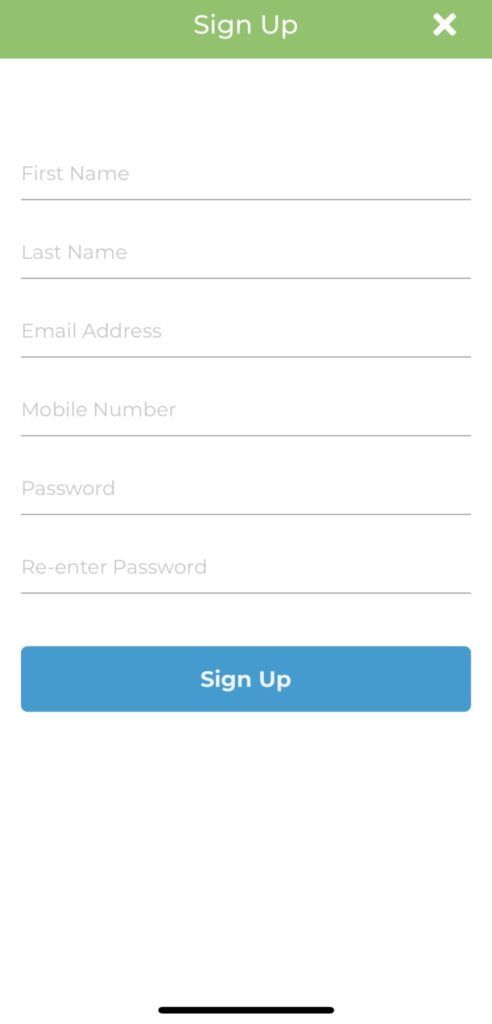
SIGN UP FOR NEW ACCOUNT
- Click “Sign Up” to create new account
- Enter your First Name & Last Name
- Enter your Email Address & Mobile Number and click “Send Code”, and the system will send you a verification code
- Enter the verification code to continue the signup process
- Create a password
LOG INTO YOUR ACCOUNT
- Enter your Email Address & Password and click “Login”
- Keep the “Keep Me Logged In” box checked if you want to stay logged in
- If you forgot your password, you can reset it

ADD PAYMENT CARD
- Click on “Wallet” in bottom menu
- Click “Add Card” to enter payment card information (Read about Debit & Credit Card Security)
IMPORTANT: When you add a debit or credit card to your Wallet, our payment gateway provider will charge $0.01 to your card to ensure that it is valid. This $0.01 charge will be automatically refunded back to your card.

FORGOT YOUR PASSWORD?
If you forgot your password and need to reset it:
- Enter Email Address you used to set up your account
- Click “Forgot Password?” below the “Login” button
- (Optional) Enter Mobile Number you used to set up your account
- If the Email Address and/or Mobile Number you enter are registered in our system, the system will email/text you a One-Time Password (OTP)
- Enter the OTP in the “Password” field and click “Login”
- Create a new password


PURCHASING PRODUCTS
ADD PRODUCTS TO SHOPPING CART
- Walk to within 5 feet of available market
- Add product by clicking “Scan” in bottom menu, and scanning barcode on package, or
- Add product from a list, using one of the following ways (Note: Use these if a product’s package does not have a barcode):
- Click “Search” in bottom menu, then click on desired category, and view products in that category
- Search for a product using the “Search by Product name” box at the top
- Click “Show All Products” to view all products


CHECK OUT & PAY FOR PRODUCTS
- Click Shopping Cart icon in upper right corner – you will be taken to the Check Out screen
- Click “Check Out”
- Select payment method
- Stored Funds – If your purchase amount is less than or equal to your “Stored Funds” account balance, select “Stored Funds”
- Click “Add Funds” to load your Stored Funds account if it does not have the required balance
- Debit/Credit Card – Select a card (NOTE: This payment method is not available at all markets)
- Payroll Deduction – If your company has approved payroll deduction as a payment method, select “Payroll Deduction” (NOTE: If your company has approved payroll deduction as a payment method, but you do not see it as a payment option, contact us)
- Credit – If your company or the vending operator has added market credit to your account, and purchase amount is less than the “Credit” balance, select “Credit”
- Company Credit – If your company has added a recurring monthly credit to your account, and purchase amount is less than the “Company Credit” balance, select “Company Credit”
- Stored Funds – If your purchase amount is less than or equal to your “Stored Funds” account balance, select “Stored Funds”
- Click “Proceed to Pay”


VIEW HISTORY OF PURCHASES
- Click on “History” in bottom menu to view a history of markets visited, products purchased, prices paid & payment methods used
- If you are near a market where you had purchased products within the past 90 days, the “Your Recent Purchases at this Location” button will automatically be displayed at the top – click on this button to go to the “Recent Purchases” category where you can quickly repurchase those products

TIPS & TROUBLESHOOTING
APP NOT RECOGNIZING NEARBY MARKET
- If you have a good Internet connection, but the app is still not recognizing the nearby market, make sure your Bluetooth and Location Services are ON.
- If you do have a good Internet connection, and your Bluetooth and Location Services are ON, but the app is still not recognizing the nearby market, terminate and restart the app.
SCAN ICON IN BOTTOM MENU DOES NOTHING WHEN CLICKED; SCAN WINDOW IS BLANK/GREY
- Make sure you have given the app access to your phone’s camera:
- iOS:
- Go to Settings -> GrabScanGo (in the list of apps)
- Turn Camera ON
- Android:
- Go to Settings -> Apps or Application Manager –> GrabScanGo (in the list of apps)
- Turn Camera ON
- iOS:
NO INTERNET CONNECTION
- Check that you have a good Wi-Fi or cellular connection. One way to do this is to visit any website using your mobile browser, and check whether it is displayed successfully.
Note: Many Wi-Fi access points require you to sign in, check in, or accept terms, before connecting you to the Internet.
PRODUCT BARCODE NOT SCANNING
- If the app is not able to scan a product’s barcode, try the following:
- Make sure the barcode is sufficiently illuminated, so your phone’s camera can recognize it
- If it is a refrigerated food or beverage, wipe away any moisture that may be obscuring the barcode
- If a product’s barcode is still not scanning properly, it is likely that the market operator has not correctly added it to the system, or the barcode is damaged. In the latter case, go to the “Search” screen, find the product using the “Search” box, and manually add it to shopping cart.
SHOPPING CART DOES NOTHING WHEN CLICKED (ANDROID)
- Make sure you have given the app access to your phone’s storage:
- Go to Settings -> Apps or Application Manager –> GrabScanGo
- Turn Storage ON
REPURCHASING PRODUCTS
- Click on the “Your Recent Purchases at this Location” link on the Home screen, the “Your Recent Purchases at this Location” button on the History screen, or the “Recent Purchases” category on the “Search” screen, to quickly repurchase your recently-purchased products – saves you valuable time by not having to scan or browse/search for the products again and again.
REFUNDS
- If product is damaged or expired, you may request replacement of product or refund of amount charged by contacting the market operator – include name of product, date of purchase, and description of damage or expiration
- We reserve the right to deny refunds or replacements if abuse of product is evident or certain circumstances arise that are beyond our control
- Refund request must be made no more than 7 business days after date of purchase
- Refund request will be processed in order received, and usually within 5 days of receipt date – an email message will be sent to requestor once refund has been processed
- Refund can only be made to requestor’s Stored Funds or payment card account – no cash refunds will be provided
DEBIT & CREDIT CARD PAYMENTS
- In order to purchase products using the GrabScanGo app, you will need to give us certain information:
- Contact information – name, email address, mobile number
- Debit or credit card information – card type, number, expiration date, CVV, and zip code
- We store your contact information in our system
- We do NOT store your debit or credit card number on our servers – it is only stored on our payment gateway provider’s (Apriva) servers; The GrabScanGo app uses industry standard TLS/SSL encryption to securely transmit debit or credit card information from the app to our payment gateway provider when you add a card; After you add the card, we only store non-sensitive card information such as the card type, the last four digits of the card number, the expiration date, and the zip code, to enable future card-on-file processing of payments for your purchases
IMPORTANT: When you add a debit or credit card to your Wallet, our payment gateway provider will charge $0.01 to your card to ensure that it is valid. This $0.01 charge will be automatically refunded back to your card.
STORED FUNDS
- Load an amount of $5 or more to your “Stored Funds” account using your debit or credit card, and then use the balance to purchase products
- When you purchase products using “Stored Funds”, the purchase amount will be deducted from your balance
- If the purchase amount exceeds the balance in your “Stored Funds” account, you will need to reload the account (see below) before you can complete the purchase
- If you cancel your GrabScanGo account, and would like a refund of the balance in your “Stored Funds” account, send a message to GrabScanGo
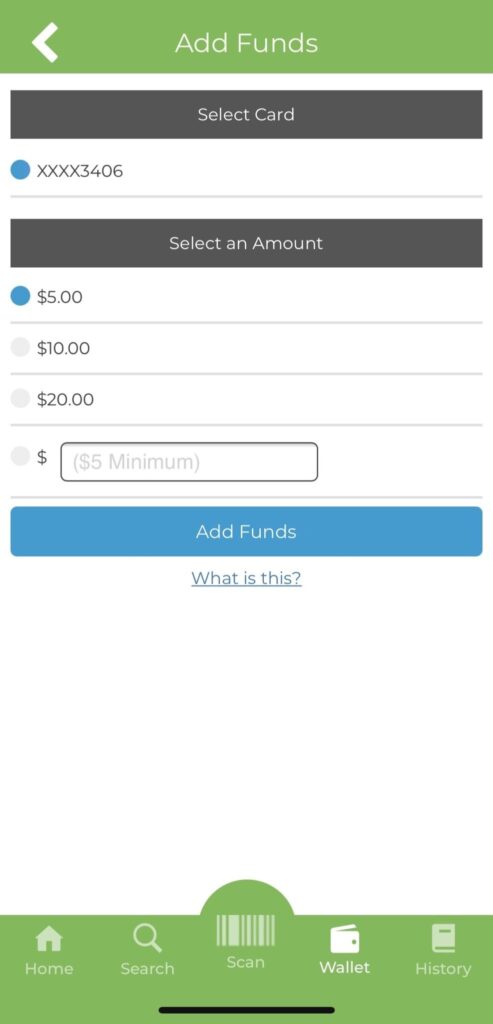
ADD FUNDS TO YOUR STORED FUNDS ACCOUNT
- On the “Check Out” screen, click “Add Funds”
- Select payment card from which to load funds
- Select one of the predefined amounts, or enter a custom amount (NOTE: Custom amount must be >$5; Total funds loaded per day cannot exceed $100)
- Click “Add Funds”
CANCELING YOUR ACCOUNT
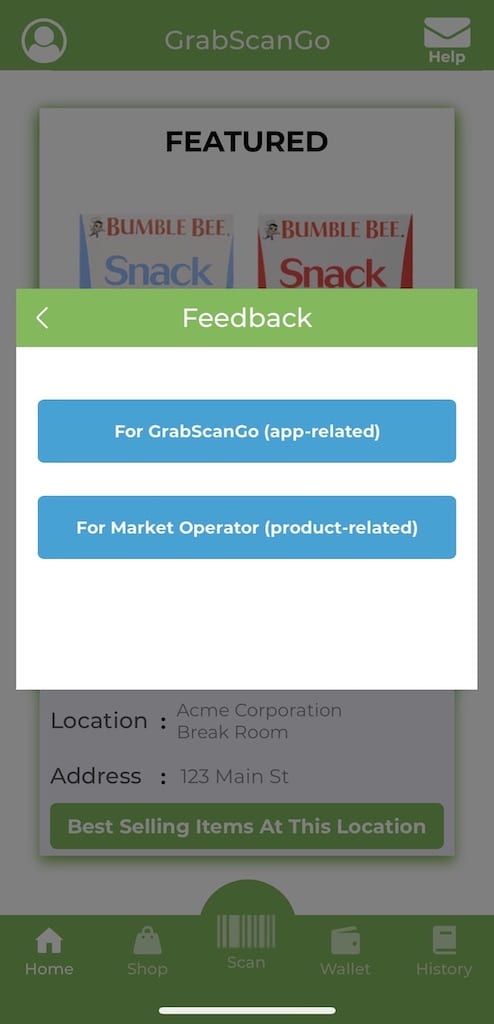
- On the Home screen, click on “Help” icon in upper right corner, and select “Feedback”
- Click “For GrabScanGo (app-related)”
- Send us a message requesting to cancel your account
CONTACT US
- On the Home screen, click on “Help” icon in upper right corner, and select “Feedback”
- Click “For GrabScanGo (app-related)” to send a message about app features, usability issues, potential improvements, account cancellations, and Stored Funds refunds to GrabScanGo
- For Account Cancellation and/or Stored Funds Refund: If you signed up for GrabScanGo using a company email address but are no longer with the company, include your personal email address in the message
- Click “For Market Operator (product-related)” to send a message about the market & its products, request new products, or request refunds or replacements, directly to market operator